Hello everyone 👋
Today I want to talk about how to expose the services you run on your personal server (in my case, a mini-PC I bought on Aliexpress) to the outside world, that is, to the Internet. And the interesting part is doing it without opening firewall ports, without relying on a static IP, and above all, without compromising security more than necessary.
I say compromising because, let’s be honest, security risks are always there. I don’t consider myself a cybersecurity expert, but precisely for that reason I’d love for any reader with more experience to share their comments to improve this setup.
The star of this post is Cloudflare Tunnels. For those who don’t know them, it’s a service that lets you create a secure channel between your machine and Cloudflare’s global network.

This article is meant as a first step: a basic guide to set up and expose services using Cloudflare Tunnel. My plan is to iterate on it in future posts, adding more robustness, automation, and advanced configuration to the solution. At the same time, I want to use this as a space to collect and organize what I’ve been learning through tinkering, reading forums like Reddit, and checking out other technical blogs.
One that has been especially helpful, and actually motivated me to publish this post, is Dan’s Garden , particularly the article External access with Cloudflare tunnels
TL;DR #
- With Cloudflare Tunnel you can expose services from your server to the Internet without opening ports or relying on a static IP.
- All you need is a domain,
cloudflaredrunning on your server, and a tunnel configured in Cloudflare. - Practical example: deploy a Jupyter Notebook accessible from anywhere in the world.
Before we start: what does this all look like? #
I’m not going to dive into the formal definition of what a Cloudflare Tunnel is. For that, you have the official documentation or even Dan’s post I mentioned earlier. What I do want to explain is the idea behind the infrastructure and why it’s worth using.
Imagine that your server opens a connection outward to Cloudflare’s network. That connection is fully managed by them, and the result is that your server becomes part of Cloudflare’s global private network. In other words, it’s as if your mini-PC at home were directly plugged into their distributed infrastructure.
Once your server is inside their network, any service you run on it can be made available within this “giant local network” of Cloudflare.
To make it easier to picture: at home you know one PC could be at 192.168.2.1 and another at 192.168.3.1, and you just use the IP address to connect one to the other. With Cloudflare, it works in a similar way, only at a planetary scale. The difference is that in this global network you can’t just connect to any address: only to those you’re authorized for.
So how does a client (say, your browser) come into play? Very simple: by accessing a domain whose DNS is managed by Cloudflare. When you visit www.example.com, Cloudflare receives the request and, instead of pointing it to a public IP server, it routes it through the tunnel that connects to your server. The effect is basically the same as if you were connecting to a machine on your home LAN, but via Cloudflare’s network.
That’s the general idea of what we’re about to set up. And why use Cloudflare? This part is a bit subjective. Nothing is ever 100% secure, but as of today Cloudflare offers a very complete ecosystem for exposing services to the Internet:
- Fast and reliable DNS
- Automatic TLS certificates
- DDoS protection
- Workers, Pages, and more to complement your setup
All of this with a level of simplicity that’s almost one-click and, best of all, in most cases completely free.
What the future holds as their market share grows is another story… but for now, let’s take advantage of it.
Prerequisites #
Before jumping in, let’s go over what you’ll need to get your tunnel up and running:
- A device to act as a server: this could be a Raspberry Pi, a mini-PC, or even a virtual machine.
In my case, I’m using a mini-PC, I bought on Aliexpress for around €170 (yes, it works great and it’s more than enough for these kinds of projects). - A domain name: any registrar will do. I usually use Namecheap, but if you want to keep things simple, Cloudflare also offers domain registration and management directly from their platform. For this post, I’ll use
example.comas the domain. - Docker and Docker Compose installed on the server: not strictly required (you could use binaries instead), but Docker will make your life a lot easier, especially when it comes to scaling or managing multiple services.
Setting up your domain in Cloudflare #
The first step is to make sure Cloudflare manages the DNS for your domain. This is essential, because tunnels work thanks to Cloudflare acting as the intermediary between clients (browsers, apps, etc.) and your server.
Here’s how to do it:
-
Log in to your Cloudflare Dashboard. From the main menu, select Account Home → Onboard a domain.
-
Enter your domain (for example:
example.com) and keep the option Quick scan for DNS records enabled so Cloudflare can automatically detect existing records.
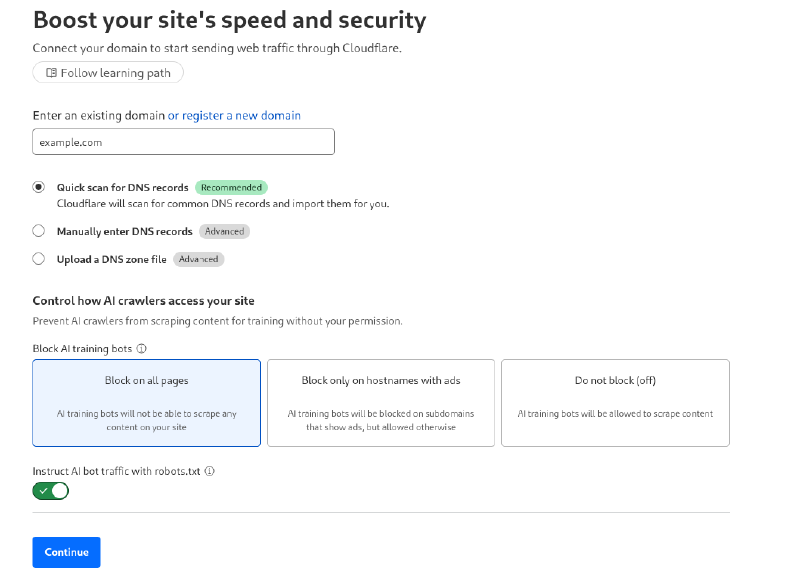
-
In the final step, Cloudflare will ask you to update the nameservers of your domain at the registrar where you purchased it (Namecheap, GoDaddy, Google Domains, etc.). For this example, let’s assume the assigned nameservers are:
keanu.ns.cloudflare.commaisie.ns.cloudflare.com
⚠️ Keep in mind that the nameservers shown to you may be different.
-
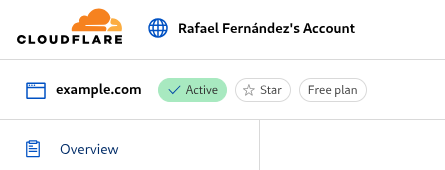
Once you’ve updated them, go back to Cloudflare and click Continue. In just a few minutes (usually less than 5), DNS propagation will complete and your domain will be fully managed by Cloudflare.
And with that, we have the key piece in place: a domain managed by Cloudflare, ready to connect to our tunnel.
Creating the tunnel #
With the domain now managed by Cloudflare, it’s time to take the next step: creating the tunnel that will connect your server to Cloudflare’s network.
-
Log in to the Cloudflare Dashboard and go to the Zero Trust section. If this is your first time using it, you’ll be asked to go through the payment gateway. Don’t worry: the free plan is quite generous and more than enough for our scenario.
-
Once inside, navigate to:
Networks → Tunnels → Add Tunnel. -
Cloudflare will give you two connector options:
- Cloudflared → the most common and recommended option for home servers or VPS.
- Warp Connector → designed more for corporate scenarios with full networks.
For our case, select Cloudflared.

internal-labs. Then click Save Tunnel.
-
Once created, Cloudflare will show you several ways to install and run the connector on your server. You can choose between:
- Direct installation with the
cloudflaredbinary - Using a package (Debian, RPM, etc.)
- Running it in Docker
- Direct installation with the
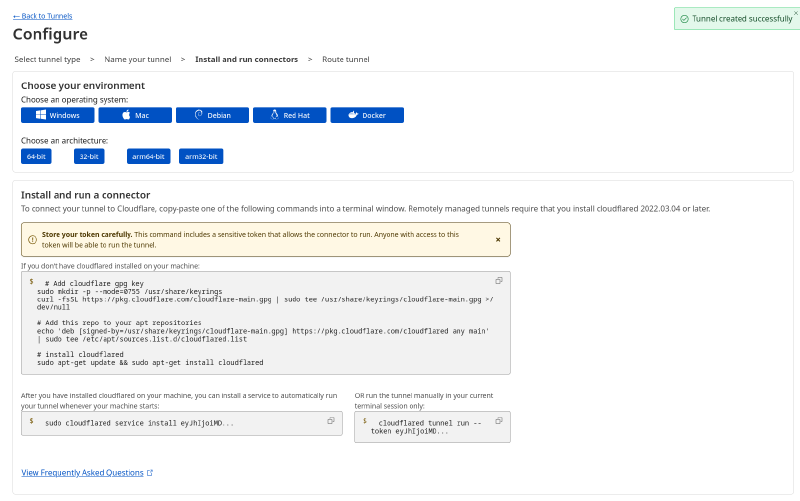
In my case, I chose the Docker option, because it makes managing and updating the tunnel easier. But any of these alternatives will work, the important thing is to have the connector running on your server.
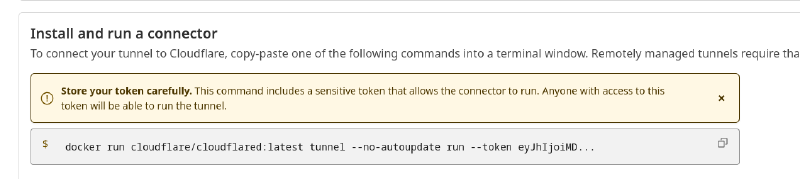
Connecting to the tunnel #
Although we could run cloudflared directly, the most practical way is to spin it up with Docker Compose. This makes it easier to integrate later on into an infrastructure with other containers.
Here’s a minimal docker-compose.yml to get the tunnel running:
services:
  cloudflared:
    image: cloudflare/cloudflared:latest
    container_name: cloudflared
    restart: always
    command: tunnel run
    env_file:
      - ./.env
In the same directory, create a .env file with the tunnel token that Cloudflare gave you when you created the tunnel:
TUNNEL_TOKEN=eyJhIjoiMDdmNjJhNzRjN...⚠️ Important: this token is unique to your tunnel, so never share it publicly.
Now, on your server, run docker compose up -d. If everything went well, you’ll see the tunnel show up as active in the Cloudflare dashboard, with a connector successfully connected.

Exposing services #
Now comes the most interesting part: exposing services from our server to the outside world through the tunnel. For this example, we’ll use a Jupyter Notebook.
Important: we’ll deploy it without a password or token, purely for demonstration purposes to show how the setup works. Never do this in production, since anyone who gains access would have full control over the machine’s file system.
1. Dockerizing the service #
First, let’s spin up the Jupyter container on our server. We can do this with the following docker-compose.yml:
services:
  jupyter:
    image: quay.io/jupyter/pyspark-notebook:spark-4.0.0
    container_name: notebook
    restart: unless-stopped
    # expose the internal port 8888 on 5001 of the host
    ports:
      - "5001:8888"
    volumes:
      # persist notebooks and other work
      - ./data:/home/jovyan/work
      - ./config:/home/jovyan/.jupyter

    command:
      - start-notebook.sh
      - --ServerApp.token=               # no token (demo only)
      - --NotebookApp.password=          # no password
      - --ServerApp.root_dir=/home/jovyan/work
      - --ServerApp.allow_remote_access=True
      - --ServerApp.ip=0.0.0.0
      - --ServerApp.port=8888
2. Exposing it via Cloudflare Tunnel #
Now go to the Cloudflare Dashboard, open your tunnel configuration, and click Next to continue with creating a Public Hostname.
Here we’ll configure how the service will be accessed externally: essentially telling Cloudflare to route traffic from a subdomain to the Jupyter service running on our server.
In this first post we’ll keep it very simple: no advanced access rules, no Zero Trust authentication. Just enough to make the service accessible from a public domain.
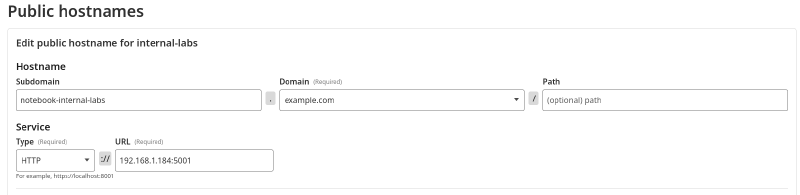
Publishing the service on a subdomain #
In our example, we start from the domain example.com and create the subdomain notebook-internal-labs.
You might be wondering why I’m using hyphens (
-) instead of dots (.). Cloudflare interprets dots as subzones, and managing those requires enabling the Advanced Certificate Manager service (about $10/month). That’s not available on the free plan, so we’ll stick with hyphens.
Protocol selection #
Here we select HTTP. In practice, this doesn’t matter too much because:
- The traffic between the client and Cloudflare always travels over HTTPS.
- For the end user, the connection is secure thanks to the TLS certificate that Cloudflare manages automatically.
In future posts, we’ll cover how to also secure the internal leg and manage our own certificates for end-to-end encryption. For those who want to dig deeper right away, I recommend reading External access with Cloudflare tunnels from Dan’s Garden, or just wait for the next post 🙂.
Internal service address #
For the URL, you’ll need to provide the local IP address of your server on the network. Neither localhost nor 0.0.0.0 will work here. On Linux, you can get the IP with ifconfig, or if you don’t have it installed: ip addr show.
Once you have it, save the configuration and try accessing https://notebook-internal-labs.example.com. !Voilá!
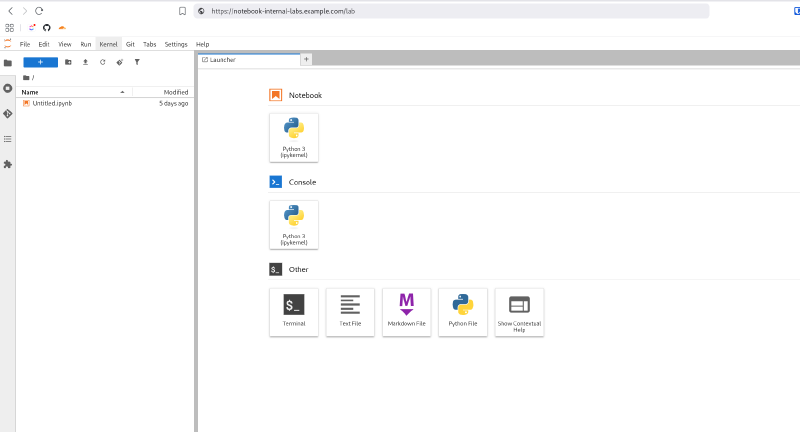
We now have a Jupyter Notebook accessible from anywhere in the world, running on our personal server, using its resources and file system just as if we were working locally. This way, we can keep our work online and always available, without depending on being physically connected to the same network.
Conclusion #
With just a few steps we’ve achieved something quite powerful: exposing a home service to the Internet in a simple and free way using Cloudflare Tunnel.
The best part is that we didn’t need to open any ports on the router, rely on a static IP, or mess around with insecure network configurations.
In this example, we deployed a Jupyter Notebook as a proof of concept, but the same approach can be applied to practically any service: a personal dashboard, a game server, an API, or a web application.
That said, what we’ve built here is only the bare minimum. There’s still plenty of room for improvement. In this first post, we’ve kept things simple to understand how Cloudflare Tunnel works and how we can use it to expose home services quickly and easily.
In upcoming posts, we’ll take it a step further by:
- Securing access with end-to-end TLS
- Adding Zero Trust policies to control who can log in
- And exploring how to integrate multiple services behind the same tunnel
In the meantime, I encourage you to try this setup, experiment with your own services, and if you come up with ideas or improvements, share them in the comments 🤘