Hey there! Now that summer’s here and the heat is kicking in, it’s the perfect time for beach, sea, and of course… a bit of coding!
If you’re more of a mountain person than a coastal soul, I’m sorry, this post isn’t for you. Today, we’re diving back into boats, the sea, and Sail. In a previous post, I introduced Sail and shared why, in my point of view, it has such a promising future. This time, I’ll walk you through how to set up a Jupyter environment to interact with Sail, whether you’re a user or someone interested in contributing as a developer.

Anyone who knows me knows I like to keep installations to a minimum. In fact, I avoid adding anything that doesn’t really belong in my workflow, or that I just consider too much noise to have sitting on my machine.
For example: yes, I work with TypeScript, I use npm, pnpm, and all that jazz… but you’ll never see me installing anything locally. I don’t even let packages stick around hogging space. Sure, I have Python installed, but that’s probably just because it came preinstalled with Fedora. Even so, I don’t install global packages. I do everything using Docker, devcontainers, or virtual environments.
Getting the ship ready: minimal setup with Docker #
Let’s get straight to the point, because the official docs already explain pretty well how to get a minimal setup running. To start using Sail with Jupyter, I go with Docker. And what we’ll need is actually two images: one for Jupyter and one for Sail.
Since Sail launches a service that we need to connect to using either Spark Connect (for versions prior to Spark 4.0) or Spark Client (for newer versions), we’ll need a Jupyter image with one of those packages installed:
pyspark[connect]==3.5.0pyspark[connect]==4.0.0pyspark-client==4.0.0
While we could start from the lightest Jupyter image, jupyter/minimal-notebook, in this post we’ll be using jupyter/pyspark-notebook:latest, since it already comes with PySpark preinstalled. This will come in handy later on if we want to compare Sail directly with PySpark, no extras, when we dive into debugging Sail.
Dockerfile for Jupyter with Spark Connect (jupyter-dockerfile)
#
FROM jupyter/pyspark-notebook:latest

USER root
RUN apt-get update && apt-get install -y netcat iputils-ping

# Install pyspark + Spark Connect
RUN pip install --upgrade pip && \
    pip install "grpcio>=1.48.1" grpcio-status "pyspark[connect]==3.5.5"

USER jovyan
For Sail, we only need a Dockerfile with Python:
Dockerfile with Sail (sail-dockerfile)
#
I would’ve liked to use something lighter here, like Alpine. However, for some reason, installing pysail with pip doesn’t quite work well on it. It’s probably because some binaries that come preinstalled on Debian aren’t available in Alpine. I’ll leave that as technical debt for a future post.
To start Sail, all you need to do is run the command sail spark server. According to the docs, the default configuration uses --ip 127.0.0.1 and --port 50051.
But here’s the thing: since we’re spinning everything up with Docker, 127.0.0.1 refers to the localhost inside the container. If we want Sail to be accessible from other containers (or even from the host), we need to change that IP to 0.0.0.0. That address exposes the service on all network interfaces, and that’s what we’ll be using, since we’re going to run two services inside the same docker-compose.
FROM python:3.11-bullseye
RUN pip install "pysail==0.3.1"
ENV RUST_LOG=info
CMD ["sail", "spark", "server", "--ip", "0.0.0.0", "--port", "50051"]
And finally, let’s bring it all together in a single docker-compose file:
Assembling the fleet with Docker Compose (docker-compose.yml)
#
services:
  sail:
    build:
      context: .
      dockerfile: sail-dockerfile
    container_name: sail-server
    ports:
      - "50051:50051"
    environment:
      - RUST_LOG=info
    networks:
      - shared-net

  jupyter:
    build:
      context: .
      dockerfile: jupyter-dockerfile
    container_name: jupyter-notebook
    ports:
      - "8888:8888"
    depends_on:
      - sail
    environment:
      - JUPYTER_ENABLE_LAB=yes
    command: start-notebook.sh --NotebookApp.token='' --NotebookApp.password=''
    networks:
      - shared-net

networks:
  shared-net:
    driver: bridge
Now that everything’s in place, we just need to spin up the containers with:
docker compose up --buildAnd in just a few seconds, you’ll have both services up and running:
- Jupyter, accessible on port
8888 - Sail, listening on port
50051

Setting sail: connecting Jupyter to Sail #
Now that Jupyter is up and running, let’s connect to the server exposed by Sail. To do that, we’ll use Spark Connect and create a SparkSession that points to Sail’s remote server.
When connecting to a remote Spark Connect-compatible server, we need to use the SparkSession API like this:
SparkSession.builder.remote("sc://<host>:<port>").getOrCreate()In our case, since the server is running inside the container named sail-server and listening on port 50051, the connection looks like this:
from pyspark.sql import SparkSession
from pyspark.sql.functions import col

spark = SparkSession.builder.remote("sc://sail-server:50051").getOrCreate()

spark.sql("SELECT 1 + 1").show(truncate=False)
And that’s it! You’re now running queries on Sail straight from Jupyter. Pretty straightforward, right?
From user to contributor: setting up for collaboration #
So far, we’ve seen how to interact with Sail directly from a Jupyter Notebook. Now let’s explore how this same setup can help streamline our development workflow, especially when you’re in the middle of implementing or debugging new features. I like to call this approach “development mode” or just develop mode for short.

Entering develop mode involves following a set of steps every time you want to work in this virtualized context (since we’re not installing anything directly on the system). However, there are other steps that only need to be done once, when setting up the environment for the first time. In this post, I’ll clearly mark which steps are one-time and which are repeated each time you enter develop mode.
My current Rust development environment is RustRover, by the JetBrains team. I like this option because it provides a solid debugger (very similar to IntelliJ), which lets me inspect the code line by line without any hassle.
Although the official documentation already explains how to set up a development environment for contributing to Sail, here I’ll walk you through an alternative approach that has worked well for me when debugging using RustRover, Jupyter, and, as always, without installing a single Python dependency directly on my system.
Requisitos #
- Java 17. I use
sdkman, which makes it easy to manage versions:
sdk install java 17.0.15-amzn- Python 3.11 with:
hatchmaturin
In my case, since I also work with Scala and Rust, I have those tools installed globally.
And of course, you’ll need to have the project forked and cloned locally:
git clone git@github.com:<my-user>/sail.git # Forked Sail projectVirtual environments with venv
#
We’re not going to install maturin or hatch globally. Instead, we’ll create a Python virtual environment and work from there.
Remember: some tasks only need to be done once, when setting up the environment. Others will be repeated each time you enter develop mode.
Inside the Sail project directory:
1. Create the virtual environment
Make sure you’re using Python 3.11, that’s important!
python3.11 -m venv .venvs/test-spark.3.52. Activate the virtual environment
source .venvs/test-spark.3.5/bin/activate3. Install dependencies
pip install --upgrade pip
pip install maturin hatch patchelf
4. Build the project
cargo +nightly fmt && \
  cargo clippy --all-targets --all-features && \
  cargo build && \
  env SAIL_UPDATE_GOLD_DATA=1 cargo test
5. Format and set up the environment
hatch fmt
hatch run maturin develop
6. Clone Spark and Ibis repositories (one-time setup only)
git clone git@github.com:apache/spark.git opt/spark
git clone git@github.com:ibis-project/testing-data.git opt/ibis-testing-data
7. Compile Spark (one-time setup only)
This step can take around 20 minutes, depending on your machine. It’s resource-intensive, so it’s a great time to grab a quick break:
env SPARK_VERSION=3.5.5 scripts/spark-tests/build-pyspark.shDeep dive: local debugging with RustRover #
To start debugging Sail, we first need to configure a cargo run configuration, just like explained in the official docs: Using the Rust Debugger in RustRover.
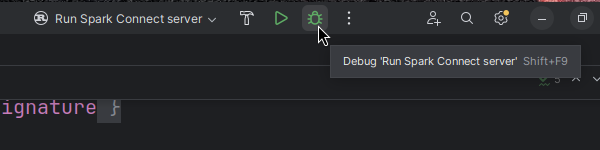
Once that’s set up, run in debug mode and wait for the Sail server to start:

Option 1: Using the PySpark CLI #
The most direct way to interact with Sail while debugging, as the docs suggest, is by installing PySpark in the virtual environment and launching the CLI:
hatch run test-spark.spark-3.5.5:install-pyspark
hatch run pyspark
From there, we can write commands directly in the PySpark terminal while observing what’s happening in RustRover.
Option 2: Using Jupyter #
The most comfortable (and visual) alternative is using Jupyter, as we saw in the earlier sections. The only difference now is that since Sail is already running in debug mode via RustRover, we don’t need to start the Sail container.
So, we reuse the original docker-compose.yml but remove the sail service and switch the network mode to host, like this:
services:
  jupyter:
    build:
      context: .
      dockerfile: jupyter-dockerfile
    container_name: jupyter-notebook
    ports:
      - "8888:8888"
    environment:
      - JUPYTER_ENABLE_LAB=yes
    network_mode: host
    command: start-notebook.sh --NotebookApp.token='' --NotebookApp.password=''
Then launch the container:
docker compose up --buildAnd that’s it, we’ve got our Jupyter Notebook available at localhost:8888.
Since the Sail server is already running locally (via RustRover), we simply create the SparkSession pointing to localhost:50051 and run our commands directly from the notebook:
from pyspark.sql import SparkSession
from pyspark.sql.functions import col

spark = SparkSession.builder.remote("sc://localhost:50051").getOrCreate()

spark.sql("SELECT 1 + 1").show(truncate=False)
Captain’s Log. Conclusion #
In this post, we’ve seen how to set up a lightweight, reproducible, and flexible environment for working with Sail, whether you’re a user or a contributor to the project. From launching services with Docker and connecting via Jupyter using Spark Connect, to local debugging with RustRover, all without installing dependencies directly on your machine.
This kind of setup not only keeps your system clean, but also makes it easier to collaborate on complex projects without wrestling with local configs, version mismatches, or dependency hell.
As I mentioned at the beginning: I like to keep my workflow as clean and isolated as possible, and this approach lets me stick to that philosophy without sacrificing productivity or visibility.
What now? #
If you’ve made it this far, thanks for reading! I hope this post was helpful, whether you were just curious about Sail or thinking of contributing to the project.
If you’ve got questions, ideas, or just want to share your own setup, the comments are open. And if you’d like to see more technical posts like this one, you know what to do: share it or follow me wherever you like best.
See you in the next one!